The Ultimate Guide to Yosemite National Park: Hiking, Backpacking + Camping in the Happiest Place on Earth
- anggeventure

- Mar 26
- 19 min read
Updated: Mar 30


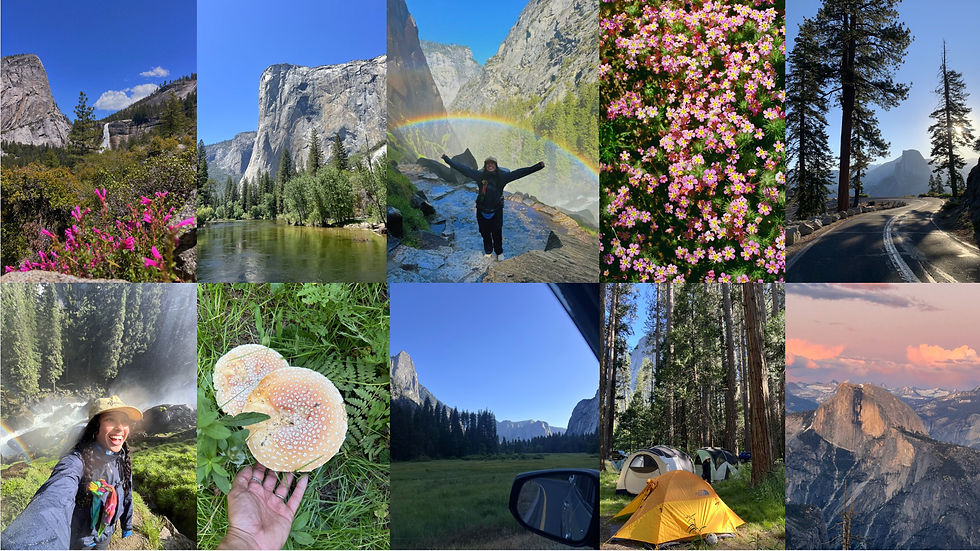
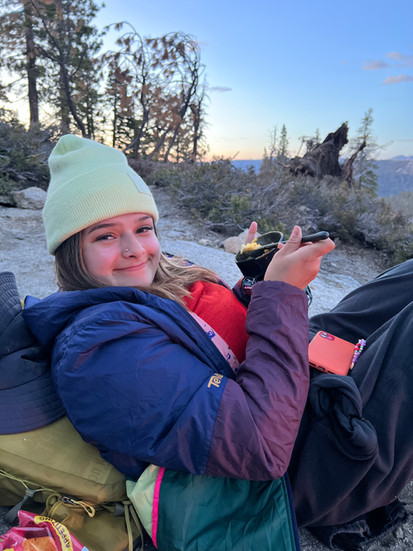
When it comes to an outdoors lover paradise, Yosemite National Park is nothing short of perfection. From massive granite cliffs, to towering waterfalls, the park offers some of the most breathtaking natural beauty and outdoor adventure in the United States. Known for iconic landmarks like Half Dome, and the stunning Mist Trail, Yosemite attracts millions of visitors each year . I've been fortunate enough to be one of those visitors many times over the last 6 years and have learned so much about the park and how to make the most of my time there. Whether you are an avid hiker/backpacker, a camping enthusiast, or just someone who wants to experience the parks beauty, this guide will help you make the most of your trip to what I like to call.. the happiest place on earth. This is my all encompassing guide to Yosemite National Park from my own experiences, and the resources available to me online! Enjoy :)
Best time to visit
This will depend on what you want out of your experience.
Spring: Best time for flowing waterfalls, wild flowers and green meadows. Prime valley hiking but Tioga Road will not be open, Glacier Point will be on standby.
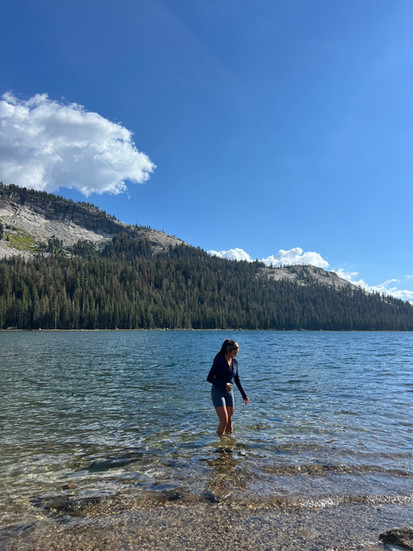
Summer: Best for swimming in the Merced river, exploring outside the valley, and backpacking. Tioga and Glacier Point road will be open! Park will be FULL.

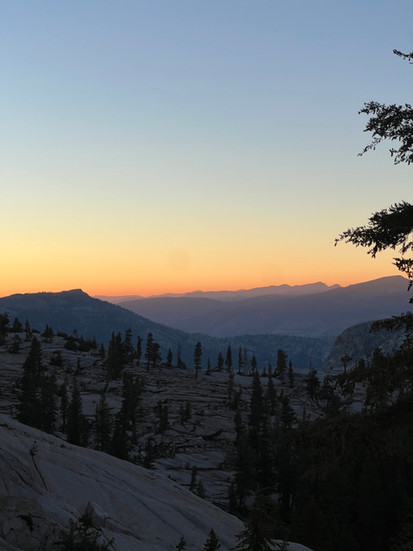
Fall: Best for fall colors, attending Yosemite's Facelift event, and less crowds. Fall is beautiful because it's often still warm enough to hike + camp but you can feel the seasons changing in the park. I want to try to experience peak fall foliage this year.

Winter: Best for winter wonderland dreaming and minimal crowds in the park. Don't forget to ice skate at curry village, and mark your calendar for February so you can catch the iconic Firefall! Keep an eye out for snow tracks.

Navigating the Park
Yosemite is our 16th largest National Park and spans approximately 1,200 square miles (3,100 square kilometers). The park is categorized into 5 different sections (Yosemite Valley, Glacier Point Tuolumne Meadows, Hetch Hetchy, and Wawona/Mariposa Grove) and has 5 different entrances (Big Oak Flat, Arch Rock, Tioga Pass, the South Entrance, and Hetch Hetchy). Travel time to and between these locations can take several hours depending on points of interest + traffic. Service is spotty in the park and you may not be able to connect to maps unless you have offline navigation. Understanding where everything is, reading park signs and planning your route is essential when visiting the park.
The Different Sections of Yosemite
Let's talk a little bit more about the different sections of the park and what you can find in each of them down below.
Yosemite Valley


This is the heart of the park and the most visited area. This is where you'll find popular landmarks like El Capitan, Half Dome, and Yosemite Falls. The valley is accessible year-round and has pretty much everything you need, except a gas station! Facilities include: campgrounds, lodging, visitor centers, shuttle services, post office, grocery, hospital, bathrooms, food services, and more.
Campgrounds: North Pines, Upper Pines, Lower Pines, Camp 4. Permits can be obtain on recreation.gov.
Popular Hikes: The Mist Trail, Lower Yosemite Falls, Upper Yosemite Falls, Bridal veil Falls, The Four Mile Trail, and Mirror Lake.
Lodging: Camp Curry, Yosemite Valley Lodge, The Awhanee. Lodging can be booked through Travel Yosemite.
Food + Grocery: Curry Village Pizza, Meadow Grill, Degnans Bakery and Deli, The Village Grill, Village Store, Base Camp Eatery, Peets, The Ahwahnee, The Ahwahnee sweet shop, and Curry Village Gift and Grocery.
My favorites: Curry Village Pizza + Meadow Grill, Village store for grocery.
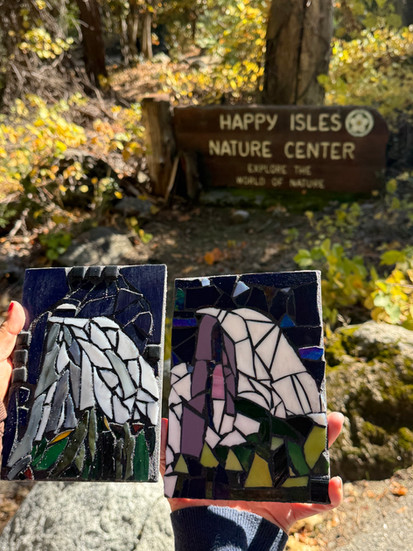
Souvenirs: Village Store, Curry Village Gift and Grocery, The Ahwahnee Gift shop, Happy Isles Nature and Art Center, Mountain Shop at Curry Village, Yosemite Valley Lodge Store, Yosemite Museum's Conservancy store.
Park Services: Yosemite Valley Welcome Center, Yosemite Valley Exploration Center (formerly Yosemite Valley Visitors Center), Wilderness Permit Center, Yosemite Museum, Yosemite Conservancy's Happy Isle Art and Nature Center, Ansel Adams Gallery, Yosemite Conservation Heritage Center.
Others: Yosemite Chapel, Post Office, Bike Rentals (Curry Village), Tube rental (Curry Village), and seasonal Ice Rink in Curry Village.
Tuolumne Meadows + Tioga Road


This stunning area of the park is much quieter than the valley and is located at a higher elevation along Tioga Road. Tuolumne Meadows is a subalpine meadow surrounded by granite domes and peaks, and is arguably my favorite part of the park. It's typically only open 3-4 months of the year due to snow and is full of wildlife and alpine surprises. Backpacking is a little less strenous than the valley, and fishing opportunities are abundant. There are a lot less ammenities and facilities located in this portion of the park so plan ahead.
Campgrounds: Tuolumne Meadows Campground. White Wolf, Porcupine Flat, Yosemite Creek all off Tioga Rd but further from Tuolumne Meadows.
Popular Hikes off Tioga Rd + Tuolumne Meadows: Mt Hoffman, May Lake, Clouds Rest, Cathedral Lakes, Glen Aulin, Soda Springs, Pothole Dome, Dog Lake.
Food + Grocery: Tuolumne Meadows Grill
Gas: Crane Flat Gas Station, off Big Oak Flat road before you start on Tioga Pass.
Park Services: Wilderness Permit Center, Visitors Center, Parsons Lodge Memorial.
Souvenirs: Tuolumne Meadows Visitors Center
Glacier Point


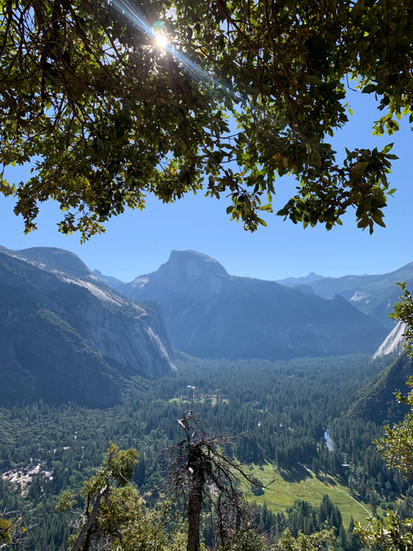
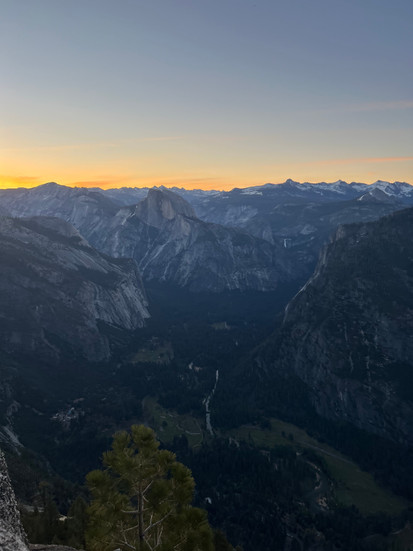
Located 3,214 ft above Curry Village, Glacier Point provides views of the famous granite peaks from a stunning overlook. Views of Half Dome, Waterfalls, and Yosemites High Country can't be missed. Accesible by car and foot seasonally, Glacier Point is a photographers dream.
Campgrounds: Bridvalveil Creek Campground.
Food, Souvenirs + Grocery: Glacier Point Gift Shop + Snack shack
Popular hikes from Glacier Point: Glacier Point Overlook, Panorama Trail, Four Mile trail descent, Pohono Trail.
Popular hikes off Glacier Point Rd: Sentinel Dome, Taft Point, McGurk Meadow, Mono Meadow, Dewey Point, and Ostrander Lake.
Tips: Go for sunrise and avoid the crowds. It's absolute magic to experience the valley wake up from above. Prepare for traffic and difficulty finding parking if visiting in the afternoon, or sunset during weekends or summertime.
Wawona and Mariposa Grove

Located in the southern part of the park, this area is famous for its giant and ancient sequoia trees. The Mariposa Grove contains over 500 mature sequoias, some of the Earths largest living trees. Wawona is also known for its historic sites and access to hiking trails. I've only camped in this section of the park but definitely need to explore the trails.
Campgrounds: Wawona Campground.
Popular Hikes in Wawona: Swinging Bridge, Chilnualna Falls, Alder Creek.
Popular Hikes in the Grove: Big Trees Loop, Grizzly Giant Loop, Mariposa Grove to Wawona Point.
Food, Souvenirs + Grocery: Wawona Hotel, Wawona Store.
Park Services: Wawona Visitors Center, Yosemite History Center,
Other: Post Office
Hetch Hetchy

Hidden in the parks Northwest region, Hetch Hetchy is home to a reservoir surrounded by towering granite cliffs that used to make up what people called a mini Yosemite Valley. An underrated part of the park, Hetch Hetchy is best nown for being San Francisco's water supply, it's beautiful hiking trails, and massive waterfalls. It is open to the public year-round.
Popular Hikes: Wapama Falls, Rancheria Falls, Poopenaut Valley.
Facilities: There is no visitors center, gift shops, gas stations, or purchasable food in Hetch Hetchy. Please plan accordingly! Only camping allowed is in the back country which can be done with a wilderness permit.
Park Entrances and Access Points
Yosemite has five main entrances. 4/5 are open annually, while Tioga Pass closes for the winter. Park entry fees are $30 per car, or you can use an America the Beautiful National Parks Pass to enter free if you have your annual pass! Each entrance offers different experiences and access to various park features. Choosing the right entrance depends on your starting point and the areas you want to explore :)
Big Oak Flat Entrance (Groveland) Located on the northwest side, this entrance is the closest for visitors coming from San Francisco and the Bay Area. It leads directly to Yosemite Valley and Tuolumne Meadows which gives you a ton of options for planning. You will find the really pretty colorful Yosemite National Park sign at this entrance, don't forget to keep an eye out if you're into National Park sign photos!
Arch Rock Entrance (El Portal) On the west side, this entrance is near the town of El Portal and Mariposa and is my favorite route into Yosemite Valley. It is often used by visitors coming from the west like Merced, and Monterey. It leads you straight into Yosemite Valley and the turn offs for Glacier Point, Tuolumne Meadows, and Wawona can all be accessed easily. This is the least windy/curvy of all of them in my opinion.
South Entrance (Oakhurst/Fresno) This entrance is near the town of Oakhurst and provides access to Wawona and Mariposa Grove. It is the main entry point for travelers coming from the south, including Fresno. This is a long drive into the valley and is the least scenic in my opinion but it will give you the grand entrance to the park through tunnel view which is really special.
Tioga Pass Entrance (Lee Vining) Located on the east side, this entrance is the highest highway pass in California at 9,943 ft. Best accessed by those traveling from Hwy 395, Mammoth Lakes. It leads you directly into to Tuolumne Meadows and is a beautiful drive. It's typically only open from late May to October, depending on snow conditions.
Hetch Hetchy (Harden Flat) Located in the north west side, Hetch Hetchy is the only part of the park you can access from this entrance.
Exploring the Park: Camping, Hiking, and Backpacking
If you're reading this blog, you're probably interested in one of the 3, so let's talk about them.
Camping in Yosemite Valley


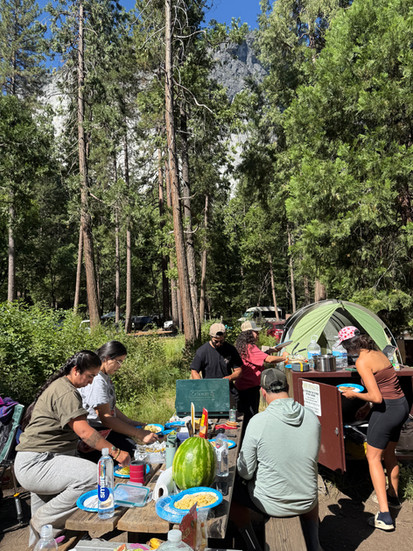


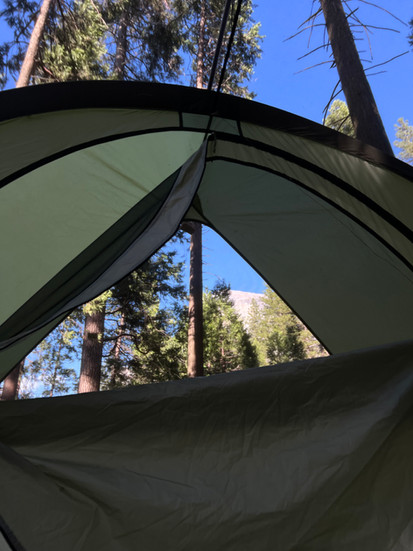


If camping in Yosemite wasn't on your bucket list before you started this blog, it probably is now . Yosemite is home to 12 official campgrounds, each with their own charm. A campsite reservation is required for any overnight stay in the park outside of the backcountry adventures and Yosemite Lodging. Car camping at trailheads and in parking lots is not allowed and can result in fees and removal of the park for the night. All 12 of the campgrounds must be reserved through recreation.gov and are released 6 months in advance at 7am PST. You should not plan for obtaining a first come, first serve site in the park as they are very unlikely to be available. While all of the campgrounds are popular, the valley sites are some of the hardest in the country to snag and will require some planning and a little bit of luck to obtain. Here’s what I know:
The Pines Campgrounds: Upper Pines, Lower Pines, and North Pines
North Pines has easy access to hiking trails (Mist Trail and Mirror Lake) as well as the Merced River. It has 81 sites suitable for tents and RVs and has flushable toilets. Reservations are recommended, especially in peak season. I really love North Pines for their river sites.
Upper Pines is the largest campground in Yosemite Valley with 238 sites. It’s somewhat close to Curry Village and provides a good base for exploring the valley floor. The campground is open year-round but fills quickly in summer.
Lower Pines sits along the Merced River and has 60 sites. It’s close to Curry Village and hiking trails. Reservations are essential just like the others. This is my favorite campground of the 3 pines because of location and views of Half Dome!
How to snag a site:
Plan in advance. Campsites are released each month and can sometimes be confusing so make sure to read through "Seasons and fees" for each campground. For The Pines, campsites will release on the 15th of every month on a rolling window. Example, on March 15 2026 @ 7am sites were released through August 14th. On April 15 2026 @ 7am sites will release through Sept 14, 2026. These rolling windows sometimes change so stay up to date annually.
Get familiar with recreation.gov and how the site works, you will need to make an account to book campsites and back packing permits and it can be a learning curve.
Set cancellation alerts. Recreation.gov has alerts for when people cancel their reservations. It's still really hard to get a site this way and can be frustrating.
Source Help. Ask friends to try obtain campsites too! The more people trying to get a site the higher your odds of getting one.
Be flexible. If you can find time to visit the park during the week, it will be a lot easier to find cancellations + sites available.
Camp 4
Camp 4 is a historic community style campsite famous among rock climbers and backpackers. It currently operates on a first-come, first-served basis and offers a communal camping experience. It was previously managed on recreation.gov so just keep an eye out for changes to the system. The campground has no hookups or showers but has heated flushing bathrooms and is close to Yosemite Valley’s climbing routes and Village. Staying here is a once in a lifetime experience!
Must-do's: Scenic Stops in the Park
Tunnel View
Valley View
Swinging Bridge
Ahwahnee Meadow
Cathedral Beach
El Capitan Meadow
Glacier Point
Washburn Point
Olmsted Point
Day Hiking in Yosemite National Park


Yosemite’s hiking trails can range from leisurely walks to challenging, and sometimes dangerous ascents. There is one thing they all have in common, and that is that you are guaranteed to be met with views you'll never forget. These are some of the best (and my favorite) trails to explore while visiting the park:
(Trails listed from easiest to hardest)
Bridalveil Falls Trail: This trail just recently re-opened and is a short paved trail to the lookout point. This trail is mostly paved but is not wheelchair accessible due to it's grade. Be prepared for nature's misters!!!
Distance: 0.7 miles
Elevation gain: 82 ft
Rating: Easy, Family Friendly.
Trailhead: Bridalveil Falls


Lower Yosemite Falls Trail: This trail will bring you to the lower view point of Yosemite Falls. The closer you get to it, the last of the waterfalls height you'll see but it's incredible to see how tall just the lower falls still are. The loop is generally considered wheelchair and stroller accessible.
Distance: 1.2 miles round trip
Elevation gain: 52 feet
Rating: Easy, family friendly.
Trailhead: Lower Yosemite Falls


Mirror Lake Trail: A family friendly option, this trail is fully paved making it wheelchair + stroller accessible. The hike is mostly flat and leads to a lake that reflects views of Half Dome and surrounding cliffs. A great one to do with young kids or elderly family members.
Distance: 5 miles round trip
Elevation gain: 301 ft
Rating: Easy, family friendly.


Vernal and Nevada Falls via the Mist Trail: Undoubtedly the most popular trail in the park, and arguably the most scenic. Experiencing The Mist Trail during prime season feels like magic. The trail leads you up a series of steep steps to Vernal and Nevada Falls, two iconic waterfalls in the park. Spring and early Summer are best if you want to experience the refreshing mist from the falls and catch the iconic rainbows. This trail is moderately strenuous but well worth the effort. The waterfalls make you feel alive!!
Distance: 6.6 miles round trip
Elevation gain: 2,158 ft
Rating: Hard
Trailhead: Mist Trail
Gear recommendations: Snacks, about 3L of water, Trekking poles, waterproof/dry bag for any items you don't want wet and good footwear.


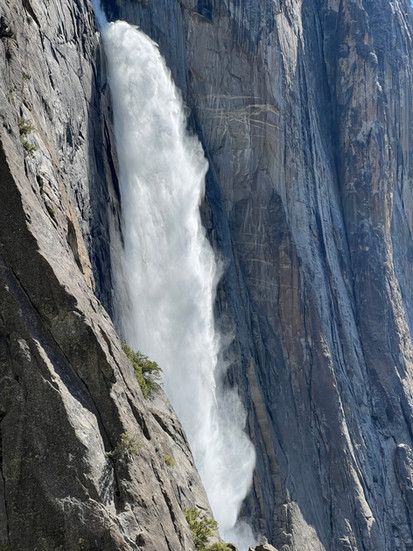
Upper Yosemite Falls Trail: Want to hike to the top of the tallest waterfall in North America? This is the trail! At 2,425 ft, Yosemite Falls flows into Yosemite Valley from towering granite cliffs. This trail is hard and requires a minimum of 3L of water to reach the top, especially on hot days. From July-September you'll want to start early to beat the afternoon heat on the way up! The climb starts in tree coverage but you'll have stunning valley views most of the way up. This hike is best done in Spring and early Summer to see the falls at peak flow. It does dry up almost completely by mid-July, sometimes earlier on low snowpack years. The first time I did this hike there was almost no flow so we were able to swim in the river above the falls but this is not safe most of the time!!! You can also extend your hike past Yosemite Falls to Yosemite Point, this will make your trip stats: 8.9 miles 3,723 ft. Pictured at end of slide.
Distance: 7 miles round trip
Elevation gain: 3,254 ft
Rating: Hard
Trailhead: Upper Yosemite Falls
Gear recommendations: Snacks, minimum 3L of water per person, Trekking poles, sun protection, and good footwear.


The Four Mile Trail: Spoiler alert.. it's not 4 miles, but it is basically the grand tour of Yosemite. The 2nd hardest hike I've done out of the valley so far, The Four Mile Trail takes you from Yosemite Valley to Glacier point via a series of very steep switchbacks and is a showstopper. You will see pretty much every iconic landmark in the park on this hike but it is tough. I did this hike when the road to Glacier Point was closed so it was a very cool experience but ideally you wouldn't want to do this one round trip. There is a Glacier Point tour bus you can ride up to the top, and then hike down to the trailhead where you can catch a free shuttle to where your vehicle is. Alternatively you could coordinate with two cars if you're traveling with friends. If you decide you want to do the full send, this hike will likely take you 6-8 hours round trip depending on your fitness level so keep that in mind! Each season will bring its own charm to this hike but it's not safe/accessible during the winter! If you want to see the waterfalls flowing, make sure you go during waterfall season.
Distance: 10.3 miles round trip
Elevation gain: 3,418 ft
Rating: Hard
Trailhead: Four Mile Trail
Gear recommendations: Trail meal, minimum 3L of water per person, Trekking poles, sun protection, and good footwear.


Eagle Peak: If hiking to the top of Yosemite Falls isn't enough for you, tack on a few extra miles and thousand feet of elevation gain to experience my all time favorite view of Yosemite Valley from Eagle Peak. Yosemite Falls, Half Dome, Glacier Point, the Mist Trail, El Capitan.. This view point has it all. I will never forget how it felt to watch sunrise up there. This is honestly an insane day send, I did it as a backpacking trip and recommend that, but I do know people who do it as a day hike. Wilderness permits are required if you plan on staying overnight.
Distance: 12 miles round trip
Elevation gain: 4,300 ft
Rating: Hard
Trailhead: Upper Yosemite Falls
Gear recommendations: Trail meal, minimum 4L of water per person, Trekking poles, sun protection, and good footwear.


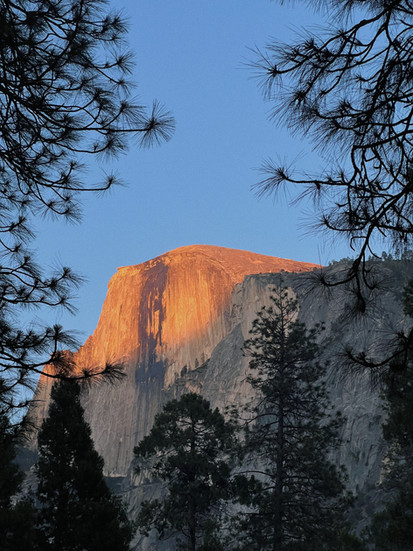
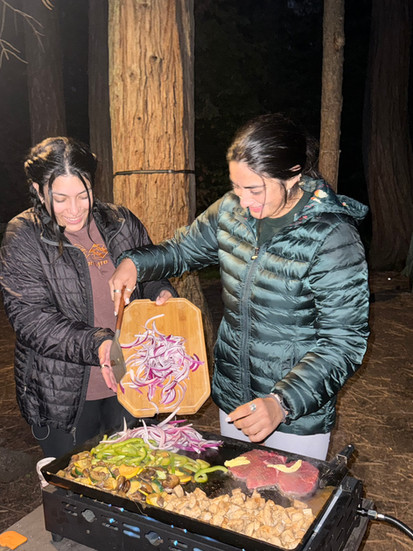
Half Dome: Permit is required, for experienced hikers only. If you love Yosemite, or challenging trails, Half Dome trail is a must. A Yosemite bucket list item, the hike to Half Dome is a 14- 18 mile round trip with a steep final ascent using the iconic cables. Permits are required via lottery during the month of March on recreation.gov, so plan ahead. There will be a ranger checking permits at Sub Dome so make sure you have yours with you, you will get turned back or fined if you don't have it and attempt to go past this point. The hike will likely take you all day so I strongly recommend starting before sunrise. My group started around 4am and it was perfect timing to avoid traffic on trail and the cables going up, on our way down there were so many people and it was so hot I couldn't imagine going up the cables like that. . If I could recommend one last thing it would be that you are likely going to be very tired and even more tired but you're probably not going to want to cook a camp meal so plan to have an easy prepped dinner or go to Curry Village for a burger or pizza!!
Distance: 17.2 (18) miles via JMT, 14.2 miles via Mist Trail
Elevation Gain: 5,305 ft via JMT, 4,900 ft via Mist Trail.
Rating: Strenuous
Trailhead: Mist Trail
Gear recommendations: Trail meal, minimum 4L of water per person, a water filter, Trekking poles, sun protection, and good footwear.
Safety PSA: Do not attempt to summit if rain or in-climate weather is in the forecast. Granite becomes very slick when wet which makes it very unsafe in rain and lightning storms. The weather can change fast in Yosemite and safety is always most important.
(Trails listed from easiest to hardest)

Details:
Distance: 0.60 miles
Elevation Gain: 49 ft
Rating: Easy, Family Friendly + Wheelchair accessible.
A short walk from the parking lot with the most stunning views. Glacier Point is beautiful no matter what but sunrise and sunset up here are otherwordly. If you do sunset, stick around for the stars.


Details:
Distance: 2.2 miles
Elevation Gain: 462 ft
Rating: Moderate
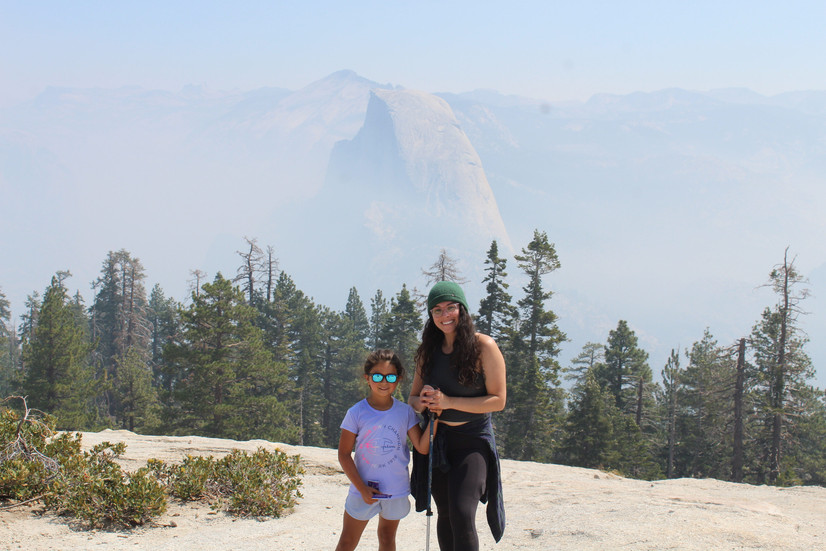
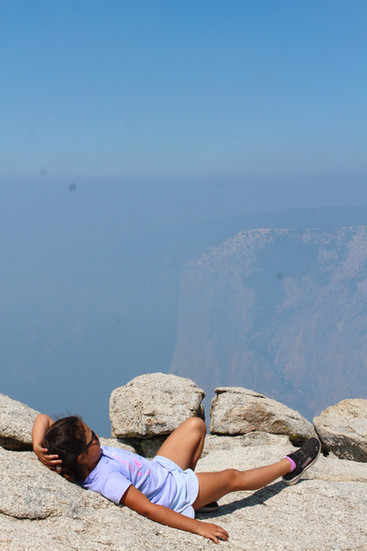
A short but fun hike above Yosemite Valley. You truly hike to the top of the Dome which is a unique experience. Stunning view of Half Dome. Not safe in wet, or inclimate weather. Avoid during lightning/thunder storms. We did it during wildfire season so it was hazy. Can be combined with Taft Point for a total of 5.2 miles round trip, 1,108 ft gain.


Details:
Distance: 2.4 miles
Elevation Gain: 360 ft
Rating: Moderate
SUCH a cool hike with an epic lookout. People get some really incredible photos here but proceed with caution because the cliff edges have dangerous drop offs. Could be a scary hike for those scared of heights. Can be combined with Sentinel Dome for a total of 5.2 miles round trip, 1,108 ft gain.


Details:
Distance: 5.3 miles
Elevation Gain: 1,430 ft
Rating: Moderate
This Trailhead starts from Glacier Point and brings you deeper into a less explored corner of the park until you reach the falls. The hike descends the whole way to the waterfall, and ascends the whole way back to the trailhead.
(Trails listed from easiest to hardest)


Details:
Distance: 2.4 miles
Elevation Gain: 488 ft
Rating: Easy
One of the best bang for your buck hikes in the park. A great family friendly (potentially challenging for young kids but doable) hike. There is a High Sierra Camp at May Lake so if you wanted to do a short overnight trip, you can try to book stay here in the canvas cabins, or you can book a wilderness permit and do it as a backpacking trip.


Details:
Distance: 9.6 miles
Elevation Gain: 1,656 ft
Rating: Moderate
Arguably one of my favorite backpacking trips ever but also a great day hike. Insane meadows and alpine lakes. Fishing. Sunsets. Milky way skies. What dreams are made of, truly. Mosquitos are horrible in early season.


Distance: 11.4 miles
Elevation Gain: 1,104 ft
Rating: Moderate
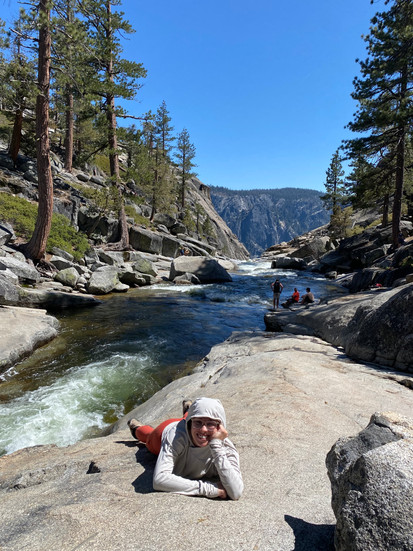
This trail was long but not too strenuous, I did it as a backpacking trip but you could definitely do it as a day hike. Beautiful views of Tuolumne meadows and the river. Waterfalls. Fishing.. and if you're lucky a mama bear and her cub crossing through a meadow. Be prepared for mosquitos if you are hear in Spring or early summer. There is also a High Sierra camp here.


Details:
Distance: 5.5 miles
Elevation Gain: 1,899 ft
Rating: Hard
The parks geographic center. Summitting Mount Hoffman puts you at the parks geographical center, and I am obsessed with the idea of that. Something about it being a summit above an alpine lake with views of the incredible back country, Yosemite Valley and beyond.. it's so poetic and makes me feel so connected to the park. I loved this hike and did it solo, I would do it again. There is some slight scrambling involved but I never felt unsafe.


Details:
Distance: 10.1 miles
Elevation Gain: 2,132 ft
Rating: Hard
WOWWWWWEEE.. Did you know Yosemite had a natural arch? You don't have to do the steep hike up to Indian Arch while doing North Dome but you should. This whole trail is incredible but is VERY sun exposed. Carry lots of water and sun protection and prepare for a long day. The views of Half Dome and Clouds Rest are 10/10.


Details:
Distance: 14.5 miles
Elevation Gain: 3,116 ft
Rating: Hard
Tied with Eagle Peak for the best view of the valley in my humble opinion. Truly indescribable. You must experience it yourself. This hike is hard and will take you all day. It is reccomended you start before the sunrise to avoid heat, and to make sure you aren't getting to the top, or hiking down in the dark. Heights/Cliff warning for those scared of them.
Hetch Hetchy Day Trails:


Details:
Distance: 5.5 miles
Elevation Gain: 1,095 ft
Rating: Easy
One of the best bang for your buck hikes in the park and so worth the trip into Hetch Hetchy! The Wapama falls trail is like the mist trails little sister. Prepare for a sun exposed day on trail but to cool off and get wet from the mist of the falls during spring time!! You may not experiene mist if you do this hike during late summer or fall. This is great family friendly (potentially challenging for young kids but doable) hike.
Day Hikes on my bucket list:
(Trails listed from easiest to hardest)
Pohono Trail
Mariposa Grove
Chilnuana Falls
Hetch Hetchy Trails: Wapama Falls, Rancheria Falls, Poopenaut Valley.
Backpacking in Yosemite
Yosemite is home to 750 miles of blissful back country trails and are truly a backpackers paradise. The system is a bit difficult to learn and it's not as simple as just showing up with your pack and sleeping where you want so these are some tips and tricks on how to enjoy the park in a way different than most.


Wilderness Permits: Permits are required for overnight backpacking trips. You can apply via lottery on recreation.gov, or attempt to obtain a permit in a timed release.
What is wilderness permit? A permit issued to minimize human impact and provide visitors with opportunities for solitude. Wilderness permits are issued to a limited number of people each day according to a trailhead quota. Trailhead quotas are based on entry date and entry point. Most trails are very popular, so advanced reservations are recommended.
How do you get one? Wilderness permits are primarily obtained on recreation.gov but can sometimes also be obtained on a walk up basis at wilderness permit stations in the park.
Recreation.gov looks confusing, how do I figure out what the Entry Points for the permits mean? If you click on each trailhead entry it will give you a description on the areas you can access with that permit. There is also an "Additional Information" section that provides really great resources!!
I got a wilderness permit, now what? You did it! Plan and prepare for your trip :) You'll have to report to a wilderness permit station prior to departing for your backpacking trip to chat with a Ranger so make sure you make time for that the day before, or the morning of your trip.
Other things to know:
Bear Canisters required: Since you'll be in bear county, a NPS approved bear canister will be required for storing food and any scented items.
Practice Leave No Trace: Protect Yosemite’s fragile ecosystems by packing out everything you pack in, camping only in designated areas, and practicing proper back country etiquette.
Prepare for Weather Changes: Weather can shift quickly in the mountains.
My favorite backpacking trips:
Cathedral Lakes
Eagle Peak
Glen Aulin


Other Bucket List experiences you should know about:
Catch Firefall
Attend a Facelift Event
Watch the climbers from the El Cap Meadow ha
Float the Merced River
Catch sunset from the meadows
Ride bikes in the Valley
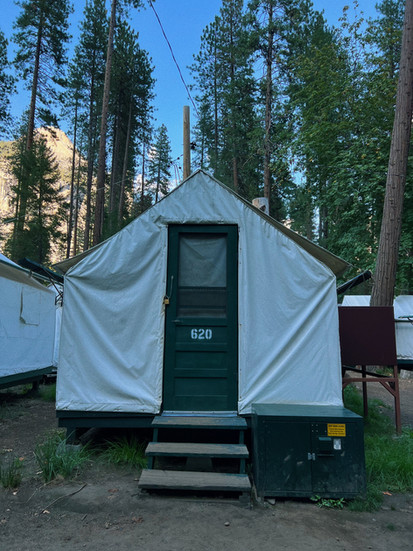
Stay in Curry Village
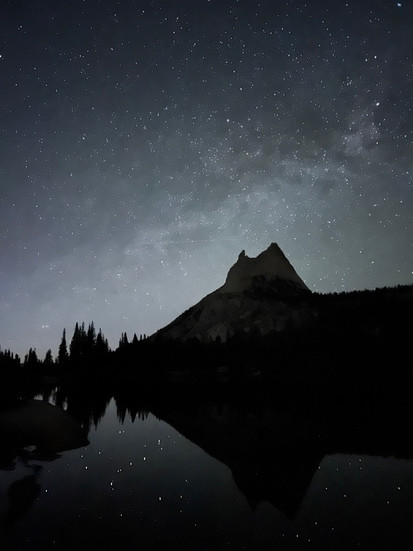
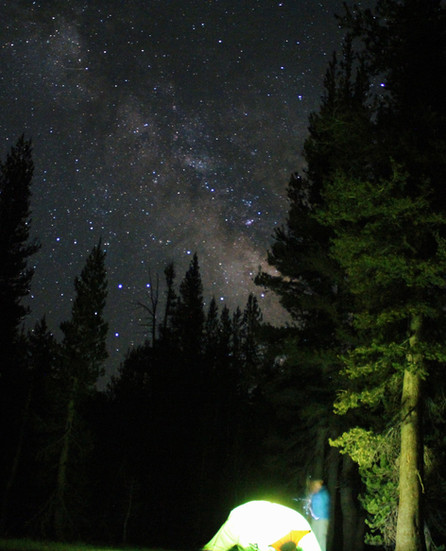
See the milky way from the park
Do an art class with Yosemite Conservancy
Basic Tips for a Great Visit
Arrive Early: Parking lots fill quickly. Plan to be at the park entrance by 8am if you want to avoid waiting in line for extended periods of time during summer + weekends. I recommend getting to the parking lot of the area you want to explore early and try to walk or utilize Yosemite's free shuttle services to get around the rest of the day!
Check for Park Updates + Closures: Yosemite often implements a reservation system which means you may not be able to just show up and enter the park. Check the NPS website to make sure all of your plans are good to go before you start the long drive into the park.
Stay Hydrated and Nourished : Carry enough water and bring a water filter if hitting the trail. Temperatures get VERY high during the summer and not having enough water can be dangerous.
Weather: Know the weather of the part of the park you are visiting. Always be specific when looking up weather. The park is big and has different weather systems and temperatures at different elevations.
Ex. if you are camping and staying in Yosemite Vally, look up Yosemite Valley's weather, not Yosemite National Park. If you are visiting Tuolume meadows, make sure you look up their weather specifically, and so on and so forth.
Respect Wildlife: Be bear aware!! Yosemite is home to California black bears. Do your research on how to recreate safely in a park to keep both you and wildlife safe. Keep a safe distance from all animals and store food properly.
Plan for Cell Service Limitations: Cell phone coverage is limited in many parts of the park. Download maps and emergency contacts before your trip.
Resourceful websites:
NPS
AllTrails
Yosemite is truly one of the most magical places I've ever experienced. No matter what time of year, or how many times you visit, the park is absolutely stunning and offers something special to it's visitors. I hope this guide was helpful to you. If you have any questions please feel free to leave a comment or send me a message. Remember the outdoor are for everyone, always leave it better than you found it, and enjoy your trip to the happiest place on earth.
Stick around for more Yosemite Guides!!


wow this was extremely helpful! so many hikes I'd never heard of that are now on my list. thank you so much!